CSV Export/Import
Verve has the ability to both export and import data from a CSV file. The CSV must have headers and data that matches what is defined on this page. The following two sections show how to export/import CSV data from within Verve.
CSV Header Format
The CSV file will be formatted with headers like so:
id | name | text | verification_status | item_type | parent_ids | parent_relatetypes | groups | filename | checksum | atomic_id_1 | atomic_name_1 | atomic_value_1 | atomic_unit_1 |
11 | Spacecraft Solar Panel | <p>Spacecraft shall have a solar panel.</p> | unverified | Subsystem Requirement | |||||||||
12 | Spacecraft Sun Sensor | <p>Sun sensor shall sense the sun.</p> | unverified | Subsystem Requirement | 11 | contains | Solar | sun_sensor_spec.stl | 420c30b0558ee1b69d | 4 | mass | 5.6 | kg |
13 | Solar Panel Description | <p>Solar panel area shall be @3d.</p> | unverified | Subsystem Requirement | 11;12 | contains;verified_by | VE: Test;Solar | 5 | area | 20.0 | m^2 |
Let’s step through each of the columns to understand their values and how we can modify them.
id
The id column references the ID of the item. This value can NOT be left blank. For an existing project, this is the current ID of the item in question. In order to create relationships between items, the ID must be referenced in the parent_ids column. When adding new rows to a CSV, this value can be any integer, so long as it is NOT already currently in use in the project.
To update an existing project with from a CSV, the id column for any items that are to be updated MUST match those already in the project.
NOTE: when new items are to be created via import (either to a new or an existing project), the ID’s of the newly created items will likely not match those provided in the CSV. As such, the ID’s within the CSV should be viewed more as an internal reference that allows the system to set things up properly.
name
The name column is the item’s title. This value can NOT be left blank.
NOTE: at any given item depth (i.e. sibling items with the same parent), values for the name column MUST be unique.
text
The text column is the item’s description. It is formatted with HTML and can include atomic mentions (provided the item has atomics associated with it), which are discussed in further detail below in the atomic_id_1 section.
verification_status
The verification_status column is only visible for items of type Verification Event, but can be set for any item. This value can NOT be left blank. The default value is unverified. The available options for the verification_status column are as follows:
[unverified, in_progress, verified, failed]item_type
The item_type column refers to the item’s type. This value can NOT be left blank. This value MUST already exist in the database. For a list of all available options for the item_type column, you can hit the API directly with a GET request to {your Verve url}/api/item_type or via the OpenAPI spec at {your Verve url}/openapi/ui under item_type. The available options are in the desc key/value pair. For convenience, a list of all the options is provided below:
[Feature, Requirement, Use Case, Test Case, Epic, Usage Scenario, Standard,
Strategic Theme, Portfolio Epic, Information, Semi / Integrated System Use Case,
Stakeholder Requirement, Defect, User Story, System Requirement,
Subsystem Requirement, Change Request, Validation, Verification, Risk, Hazard,
Harm, Failure Mode, Design Description, Folder]parent_ids (nullable)
The parent_ids column, in conjunction with the parent_relatetypes column, is used to establish relationships between items. The parent_ids column is used to specify the item ID of the parent (which MUST exist in the id column), while the parent_relatetypes column defines the type of relationship. This value CAN be left blank, see the NOTE below for more info.
An item can have relationships to multiple parents, and can specify different types of relationships between the different parents. In this case, a semi-colon ; is used to specify the multiple parent ID’s and relationship types. Take a look at the item with id = 13 in the example data above - it has 11;12 for the parent_ids column and contains;verified_by for the parent_relatetypes column. In this case, Verve will create a contains relationship with item ID 11 and a verified_by relationship with item ID 12. The number of provided parent ID’s and relationship types separated by semi-colons must match!
NOTE: if no value is provided for both the parent_ids and parent_relatetypes columns, a contains relationship is created to connect it to the project root. At least one item MUST have a relationship with the project root in order for it and its children to be displayed in the system editor.
parent_relatetypes (nullable)
The parent_relatetypes column is used in conjunction with the parent_ids column to establish relationships between items. This process is discussed in greater detail in the above section for parent_ids. This value CAN be left blank, see the note in the above section for more info.
The available options for the parent_relatetypes column are as follows:
[verified_by, impacted_by, implies, contains, derives, copied_by, satisfied_by,
refined_by, traced_by, executes]groups (nullable)
The groups column is used to add items to groups. This value CAN be left blank. If the specified group does not exist in the project, the group will be created. Like the parent_ids and parent_relatetypes columns, multiple groups can be defined for an item if they are separated with a semi-colon.
For a list of all available groups for a given project, you can hit the API directly with a GET request to {your Verve url}/item_group/pid/{project ID} or via the OpenAPI spec at {your Verve url}/openapi/ui under item_group. The name of each group is the display_name key/value pair. For convenience, a list of all the default groups is provided below. Any given project could have additional groups not encapsulated by this list:
[VE: Inspection, VE: Demonstration, VE: Test, VE: Analysis] NOTE: group names are case sensitive. If a CSV has groups with the same name but different cases (such as Safety and safety), BOTH groups will be created.
filename (nullable)
The filename column, in conjunction with the checksum column, is used to attach files to items. This value CAN be left blank in order to not associate any file with an item, so long as the checksum value is blank as well.
NOTE: the provided filename/checksum combination MUST already exist in the system, i.e. the filename in question has already been uploaded and has an associated checksum.
checksum (nullable)
The checksum column is used in confjunction with the filename column to attach files to items. This process is discussed in greater detail in the above section for filename. This value CAN be left blank.
atomic_id_1 (nullable)
The atomic_id_1 column is used with atomic_name_1, atomic_value_1, and atomic_unit_1 columns to associate an atomic with an item. The ID provided for the atomic is NOT associated with the id column (which is for item ID’s) and therefor CAN overlap with the numbers provided, so long as integers are used. This value CAN be left blank, so long as the other associated columns are blank as well. More than one atomic can be associated with an item, please see the note below on Adding Additional Atomics to an Item for more info.
NOTE: the text column can reference the name, value, and/or unit of an atomic by their atomic ID. Take a look at the text column for item with id = 13, which is:
<p>Solar panel area shall be @3d.</p>The @3d is an atomic mention that references atomic with ID = 3 (which is the value for atomic_id_1 in that row). The format for an atomic mention is @{atomic_id}{n/d/u}, where atomic_id refers to an atomic ID that is associated with the item and n/d/u reference either the name, data value, or unit of the atomic. For our example item id = 13/atomic id = 5, to reference setting up the text like so:
<p>Solar panel @5n shall be @5d @5u.</p>Would produce rendered text that would look like this:
Solar panel area shall be 20.0 m^2.However, since the text contains atomic mentions, any update to the atomic’s name, value, or units would automatically update the rendered text.
When creating a new atomic, like creating a new item, there is no guarantee that the atomic ID provided in the CSV will be the same as what the system creates. In this case, any atomic references made in the item’s text column will be updated to use the atomic ID of the atomic created by the system.
atomic_name_1 (nullable)
The atomic_name_1 column is used with atomic_id_1, atomic_value_1, and atomic_unit_1 columns to associate an atomic with an item. This value CAN be left blank, so long as the other associated columns are blank as well. An atomic’s name can be referenced in an item’s text column, see the above section for atomic_id_1 for more info. More than one atomic can be associated with an item, please see the note below on Adding Additional Atomics to an Item for more info.
atomic_value_1 (nullable)
The atomic_value_1 column is used with atomic_id_1, atomic_name_1, and atomic_unit_1 columns to associate an atomic with an item. This value CAN be left blank, so long as the other associated columns are blank as well. An atomic’s value can be referenced in an item’s text column, see the above section for atomic_id_1 for more info. More than one atomic can be associated with an item, please see the note below on Adding Additional Atomics to an Item for more info.
NOTE: atomic values are stored in the system as either floats, integers, or strings. The datatype of the atomic value is inferred from the atomic’s value. It will start with float, use integer if there is no decimal place . in the value, and fall back to string if it cannot cast the value to either float or integer.
atomic_unit_1 (nullable)
The atomic_unit_1 column is used with atomic_id_1, atomic_name_1, and atomic_value_1 columns to associate an atomic with an item. This value CAN be left blank, so long as the other associated columns are blank as well. An atomic’s unit can be referenced in an item’s text column, see the above section for atomic_id_1 for more info. More than one atomic can be associated with an item, please see the note below on Adding Additional Atomics to an Item for more info.
NOTE: behind the scenes, an atomic’s unit is converted to a unit ID. In doing so, the system first searches the unit shorthand, then unit name, before falling back to each if it cannot find the provided input unit value. The search is case sensitive, so unit names MUST match the unit values in the database.
For a list of all available unit options, you can hit the API directly with a GET request to {your Verve url}/api/unit or via the OpenAPI spec at {your Verve url}/openapi/ui under unit. The available shorthand options are in the shorthand key/value pair, and the unit names are in the name key/value pair. For convenience, a list of all the shorthand options is provided below:
[kg, m, s, mm, km, mg, g, min, hr, s, °C, m^2, ha, km^2, mL, L, m^3, m/s, km/h,
kg/m^3, N, kPa, W, kW, kJ, MJ, kW⋅h, A, C, mA⋅h, in, ft, lbs, each, %, hidden]Additionally, this is a list of all the names:
[kilograms, meters, seconds, millimeters, kilometers, milligrams, grams, minutes,
hours, seconds, degrees Celsius, square meters, hectares, square kilometers,
milliliters, liters, cubic meters, meters per second, kilometers per hour,
kilograms per cubic meter, newtons, kilopascals, watts, kilowatts, kilojoules,
megajoules, kilowatt-hours, amperes, coulombs, milliamperes-hour, inches, feet,
pounds, each, percent, hidden]Adding Additional Atomics to an Item
An item can have between 0 and n number of atomics attached to it. To attach more than one atomic to an item, simply add more columns (in numerical order) for id, name, value, and unit. For example, a CSV that contains an item with 3 atomics would have these additional columns (with example data provided as well):
atomic_id_2 | atomic_name_2 | atomic_value_2 | atomic_unit_2 | atomic_id_3 | atomic_name_3 | atomic_value_3 | atomic_unit_3 |
|---|---|---|---|---|---|---|---|
6 | length | 4.0 | m | 7 | width | 5.0 | m |
Any items that didn’t have these additional atomics (or any atomics for that matter) would simply have set values (and those for atomic id/name/value/unit 1) blank.
Export to CSV
To export a project to CSV, from the system editor, click the cloud dropdown in the top right corner and select Export to CSV. This will download a CSV file representing your currently selected project’s data.

Import from CSV
There are several options for importing data via CSV. You can import data to a new project, add data to an existing project, or update data in an existing project. We will walk through how each of them and explain the differences between them.
Import Data to a New Project
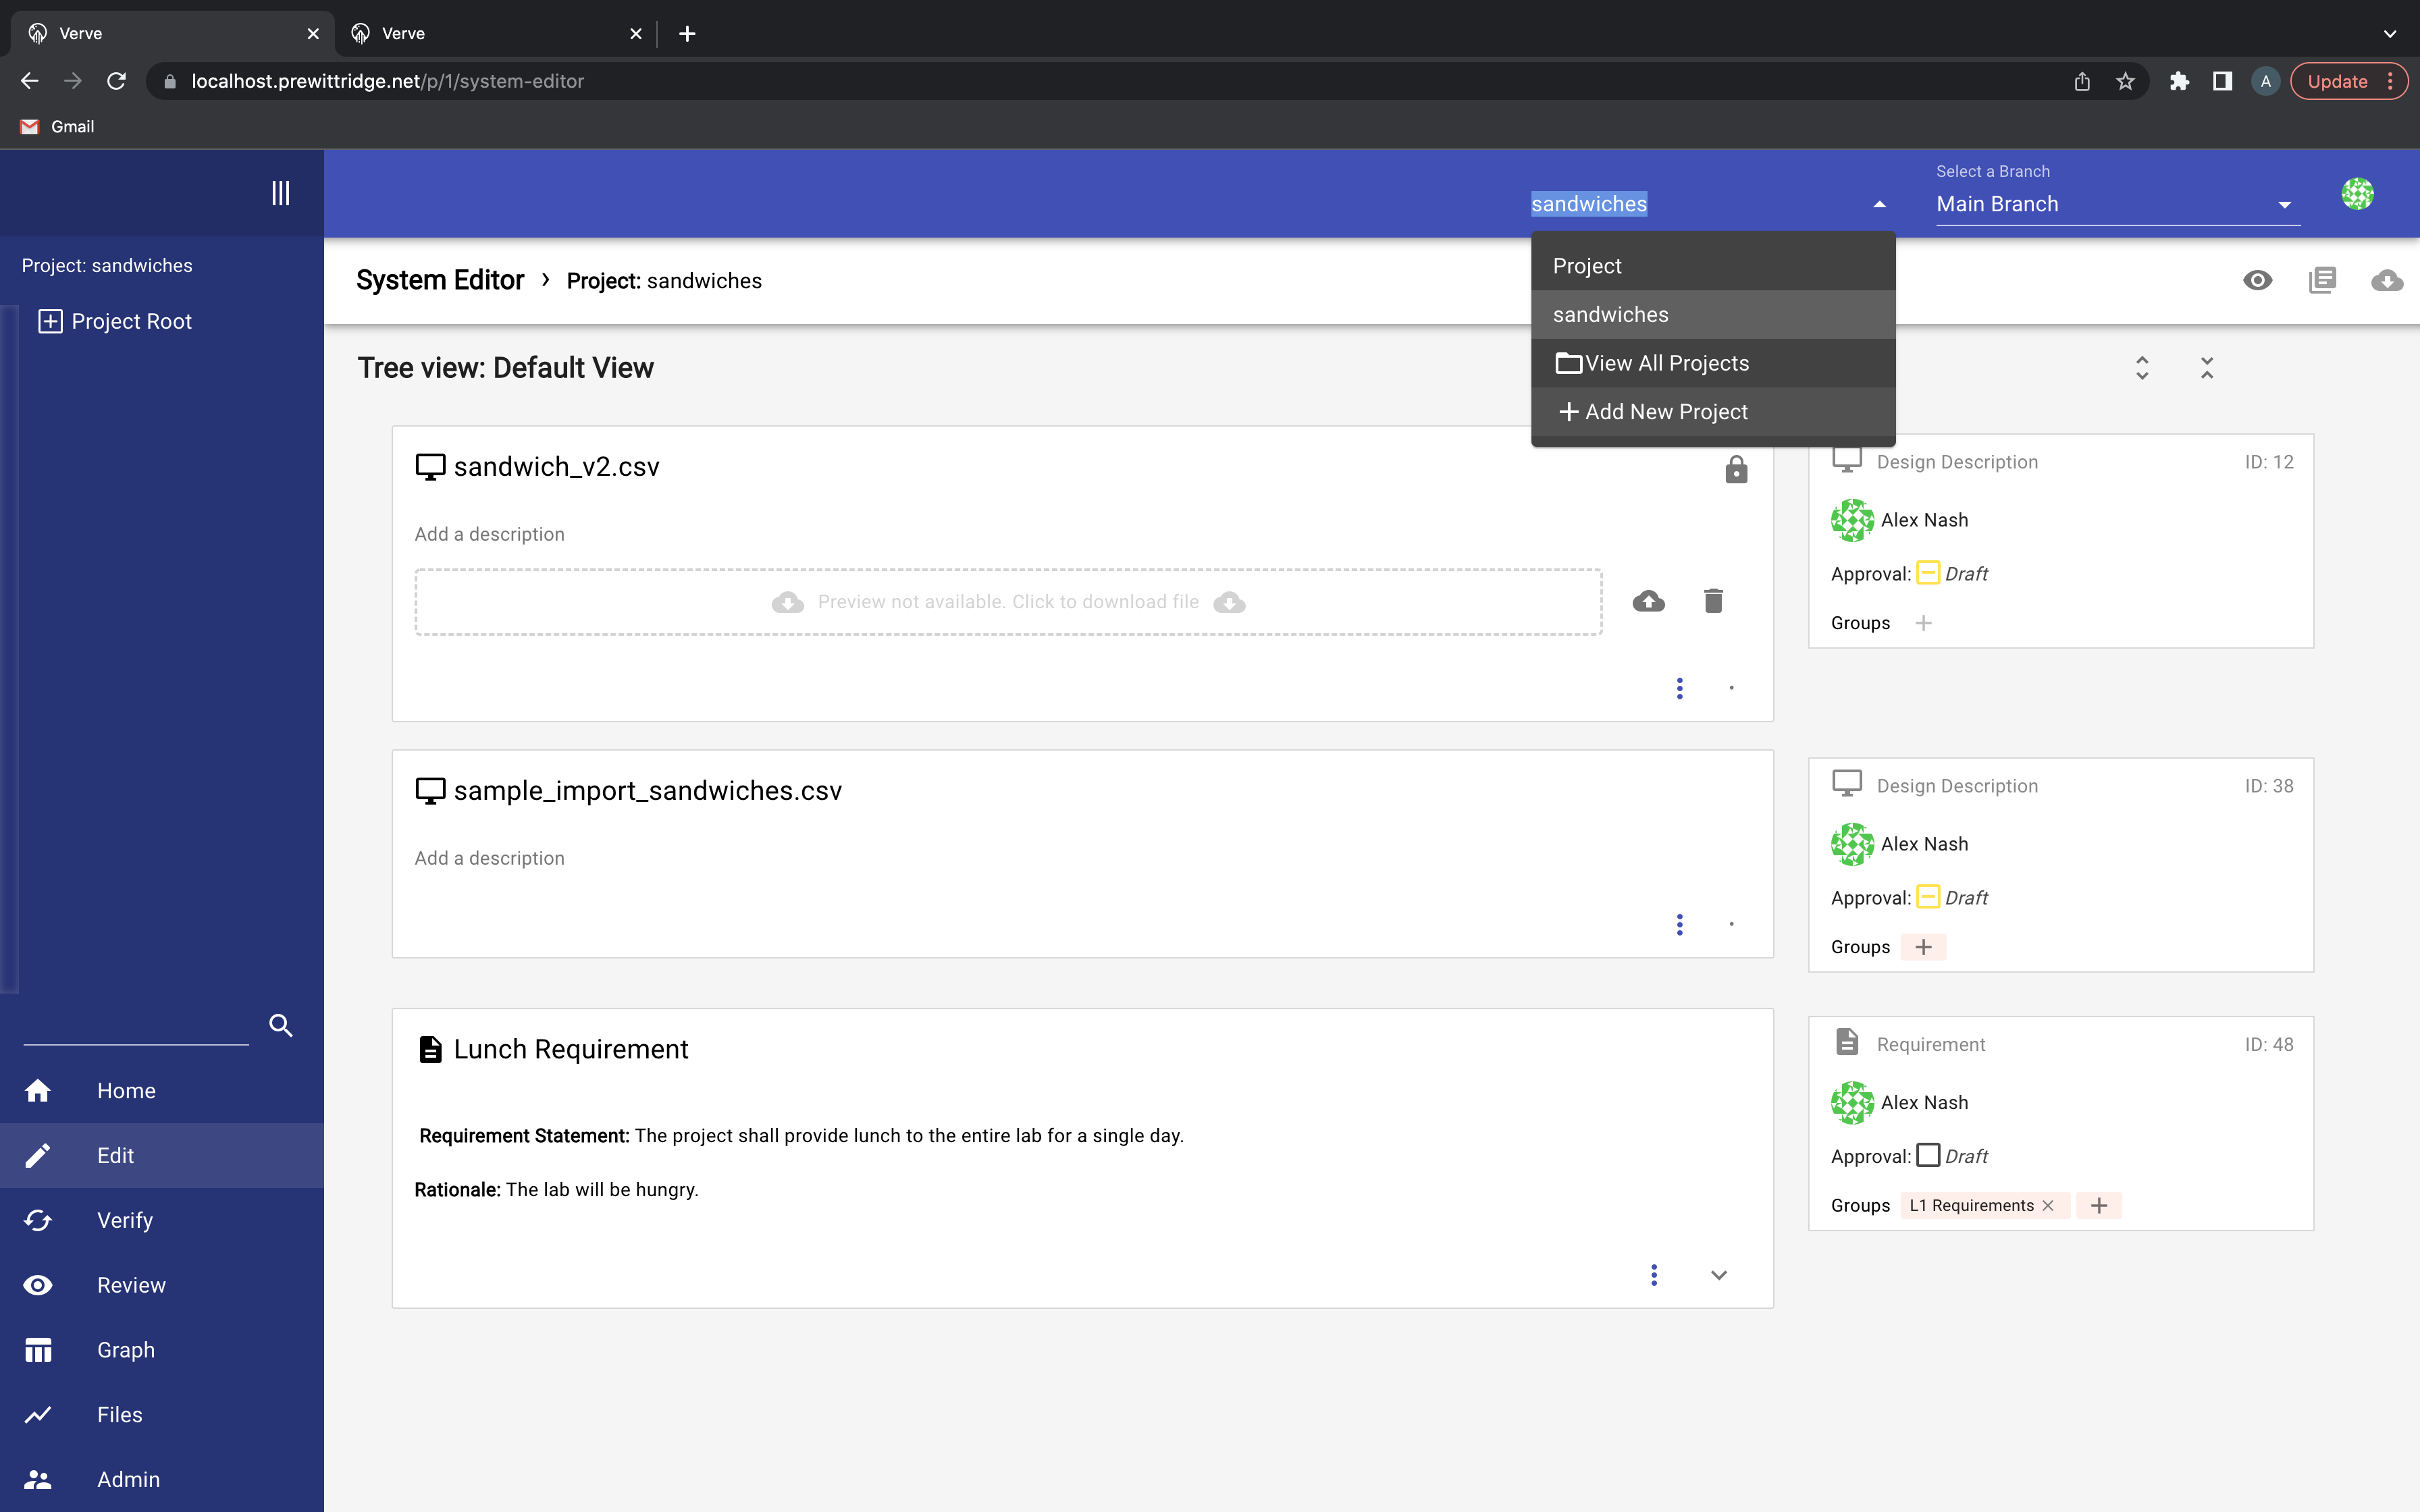
This is the simplest option to understand conceptually. First, create a new, empty project (if one doesn’t exist already). You can do so via the Projects dropdown like so:
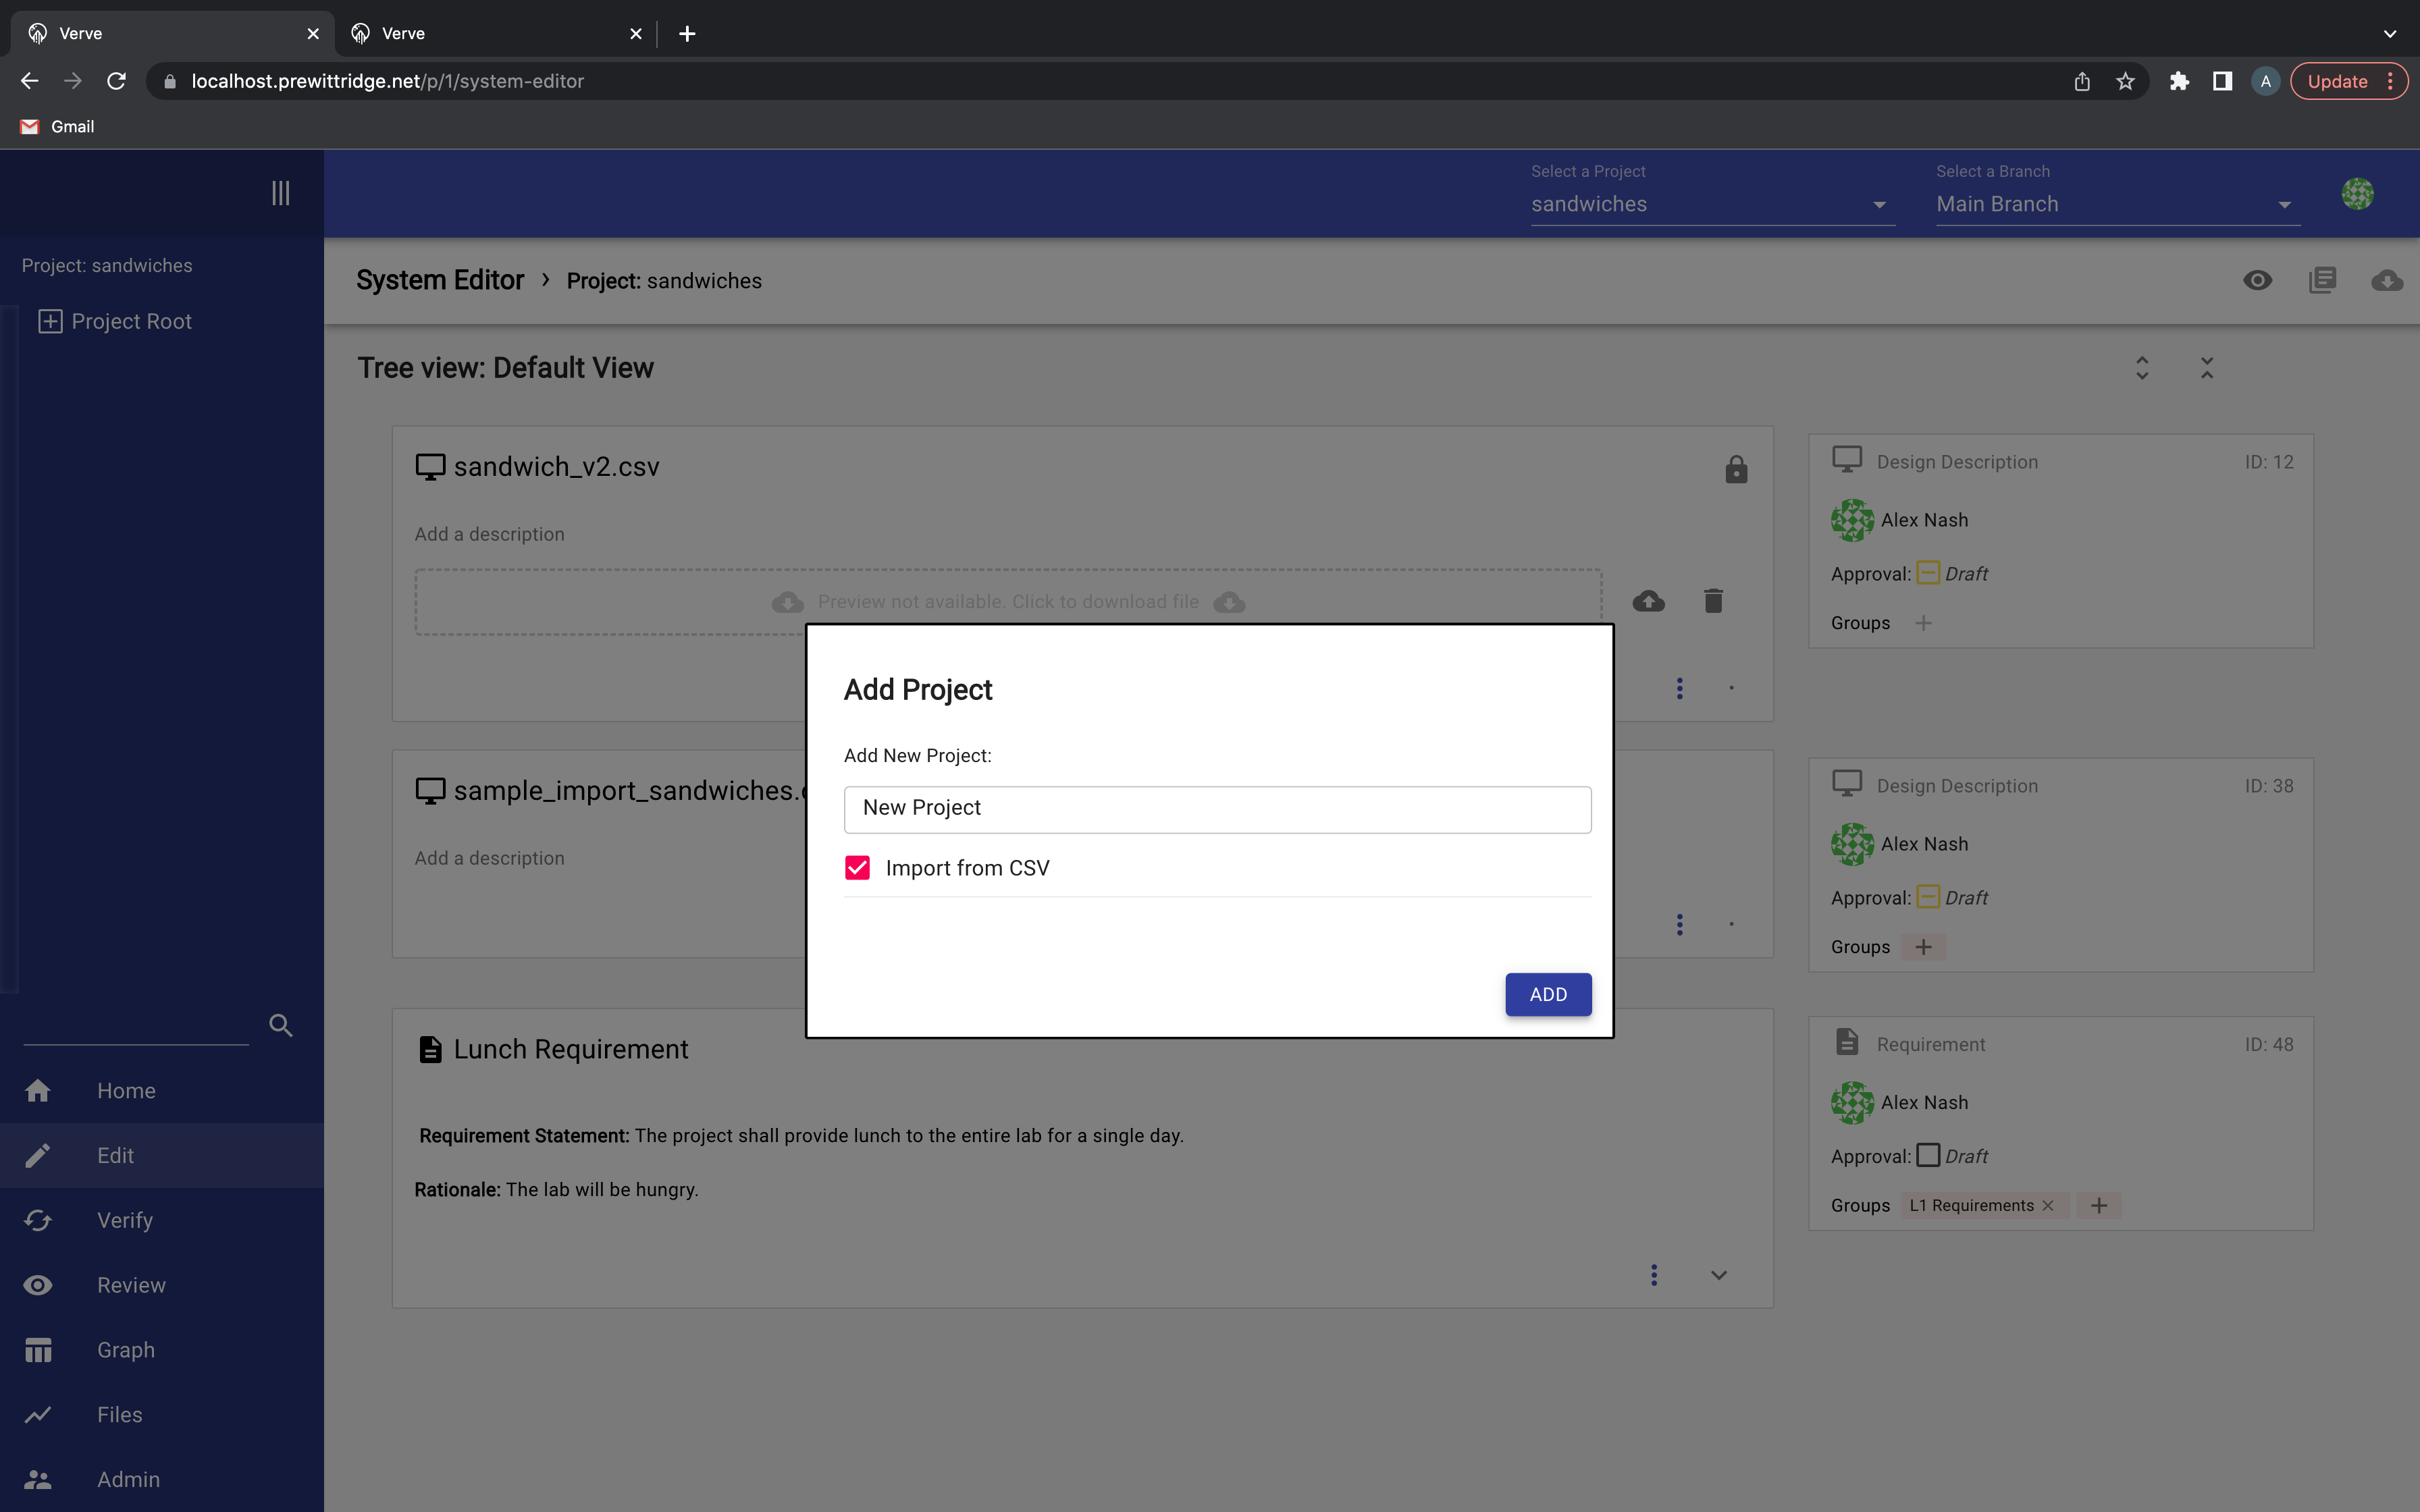
Clicking the Add New Project will allow you create a new project, and if you click the Import from CSV button, will take you to the files panel:
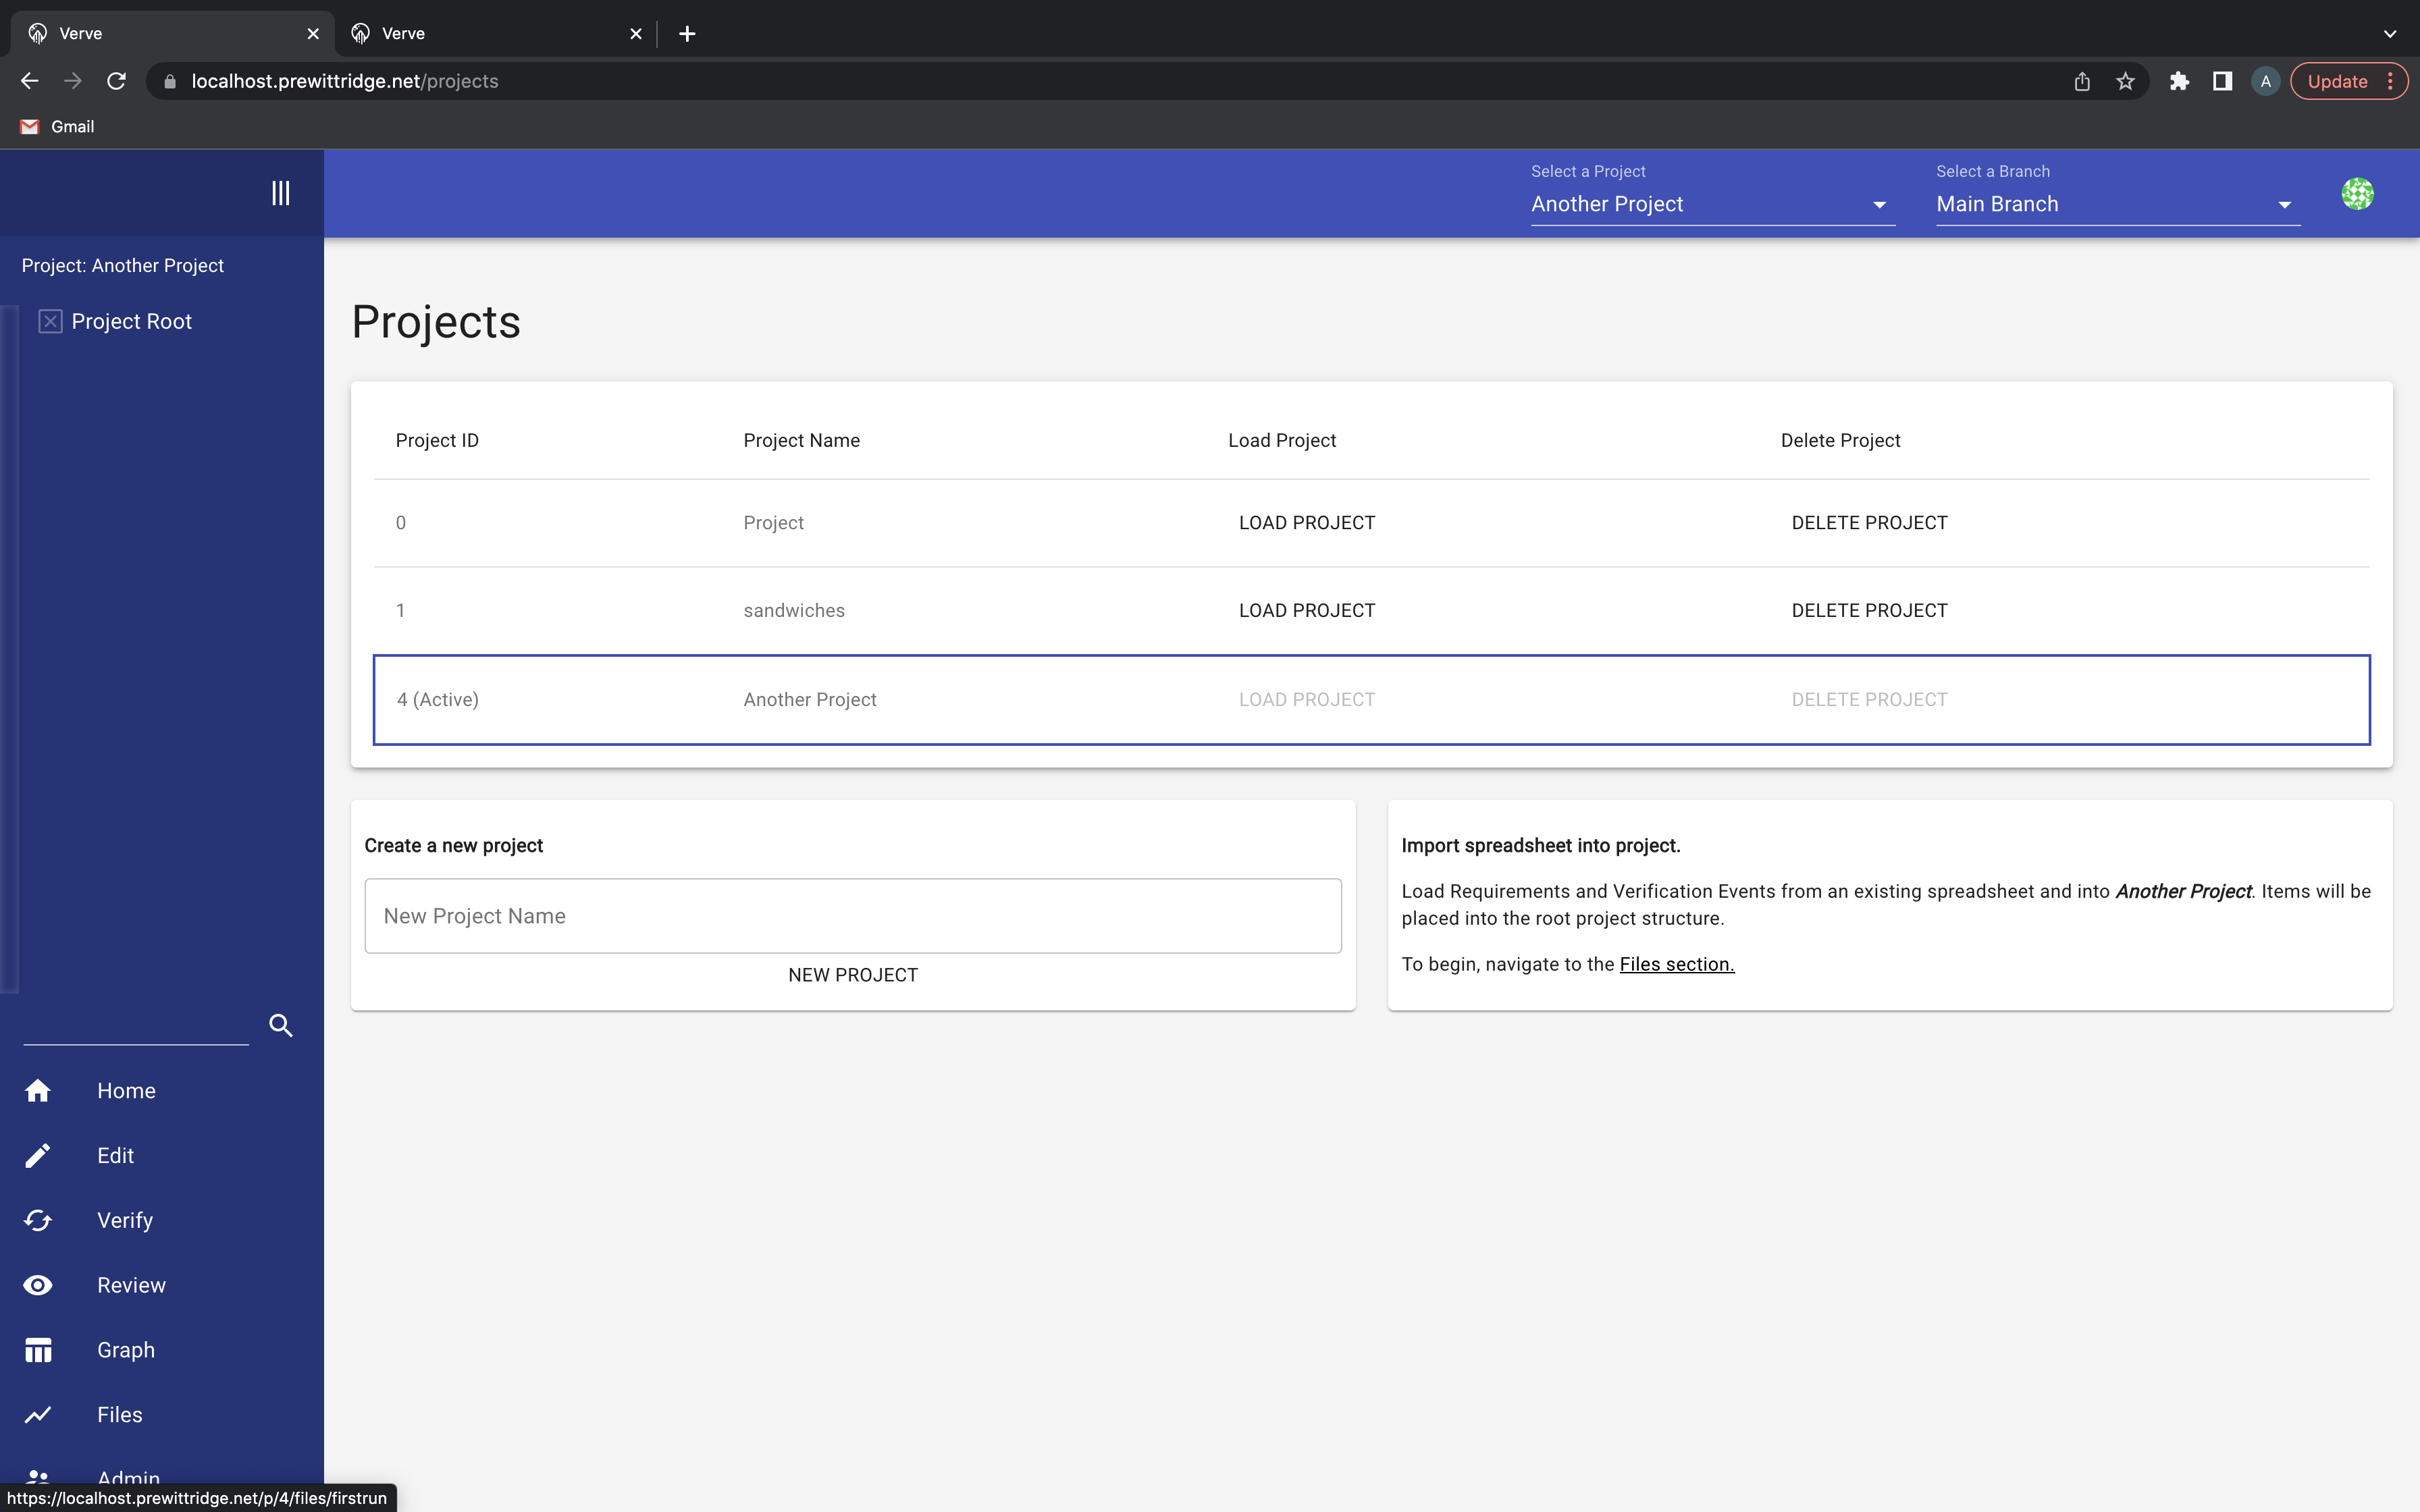
Alternatively, clicking View All Projects will take you to the projects panel, where you can also create a new project. Once created, a blank project will have a link to take you to the files panel, or you can navigate there from the left side of the screen by clicking the Files button:
Ultimately, you will be directed to the files panel. A blank project will have only one option that won’t be greyed out, Import from CSV:
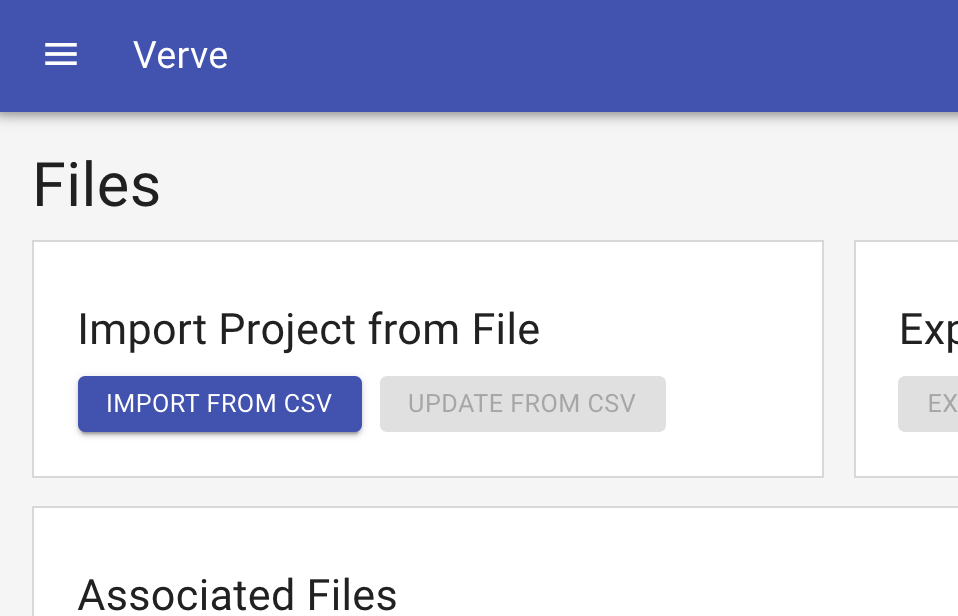
Clicking this button will give you the option to upload a file. Upload a CSV formatted properly with the headers as discussed above, and (barring any error with the CSV) the project will be populated with the data from the provided CSV.
Add Data to an Existing Project
Beyond uploading a CSV to a blank project to populate it with data, you can also upload a CSV to add data to an existing project. With a project that has some data in it, navigate to the files panel (via the Files tab on the left side pop out) and click Import from CSV. This will allow you to upload a CSV as if you were uploading one to an empty project, except that it will create new items/atomics/relationships for all of the data in your CSV.
NOTE: only choose this option if you want to upload the data from your CSV irrespective of the data in your project. If you were to export your project to CSV and then reupload it via this option, you would end up with essentially duplicate data for everything you had already created. This option is intend for when you want to merge the data from one project into another.
Update Data in an Existing Project
Besides uploading new data to a project, you can also update data in a project with data from a CSV. Once again, navigate to the files panel from within your desired project, but this time click Update from CSV. You will be asked which item you want to attach your CSV to, then Verve will attempt to update your project by matching item ID’s in the id column with item ID’s in your project.
NOTE: it is CRITICAL that these ID’s match 1:1 to avoid any undesired behavior. If any item ID is found in your CSV that is not in your project, the item (and all of its associated data) will be treated like a new item. The biggest “gotcha” to watch out for is making sure there isn’t an offset between the item ID’s of your project and your CSV. For example, if you have an items with ID’s = 7, 8, and 9 in your project but are referring what should be the same item ID’s in your CSV as 8, 9, and 10, the system will create a new item for ID = 10 and update the wrong items for ID’s 8 and 9. It cannot be stated enough, triple check your CSV’s item ID’s against your project’s item ID’s before using this!